
Christmas Nail Art to Celebrate the Holiday Season
The holiday season is the perfect time to spread festive cheer, and what better way to do this than with Christmas nail art? From intricate designs featuring classic symbols like Santa hats, snowflakes, and reindeer to modern and abstract patterns, these festive nails will add a magical touch to your look. Whether you’re spending Christmas with family or partying with friends, cute Christmas nail designs can complete your holiday ensemble. Get inspired by vibrant red and black plaid nails or elegant foiled green nails, which are always a hit during this merry season.
For a dash of creativity, try the whimsical designs from Santa’s hat Frenchies to the sophisticated abstract Christmas nails, which beautifully mix golden glitter and festive colors. To achieve these looks, start with the best nail polishes and products, ensuring long-lasting and vibrant results. Popular choices include glittery reds, shimmering greens, and frosty whites. Don’t forget to use quality tools to maintain precise and sharp designs. For tips on keeping your nails healthy and beautiful during the festive season, ensure you moisturize regularly and avoid harsh removers. These seasonal designs are more than just nails; they’re a fun way to show off your holiday spirit.
Materials for Creating Stunning Christmas Nail Art:
- High-quality nail polish in festive colors (red, green, white, gold)
- Fine nail art brushes
- Glitter and foil
- Top coat for durability and shine
- Nail stickers or decals for intricate designs
For a step-by-step guide on creating these stunning looks, explore more detailed techniques in The Ultimate Beginner’s Guide to Nail Art: Tools, Tips, and Techniques. Stay stylish and ensure your nails look as festive and beautiful as the holiday season itself by following the latest trends in nail design.

Christmas Glitter Nails
Christmas Glitter Nails add a touch of sparkle to your festive celebrations, making them perfect for holiday parties and gatherings. These nails capture the joyous essence of the season with beautiful combinations of glittery reds, greens, and silvers, providing an elegant and glamorous finish. If you’re new to nail art, The Ultimate Beginner’s Guide to Nail Art: Tools, Tips, and Techniques is a great place to start. For the latest trends, check out Stay Stylish: Trending Nail Art Designs for [Current Year/Season], and for nature-inspired designs, explore Bringing the Outdoors to Your Fingertips.
Making Christmas Glitter Nails
To begin making Christmas Glitter Nails, start with a clear base coat to protect the nails. Apply a base color, such as vibrant red or deep green, to give the nails a festive foundation. Using a sponge, apply glitter polish—preferably in coordinating colors like red, green, or silver—in a gradient manner to create a shimmering effect. Highlight one or two accent nails with additional glitter for an added touch of holiday charm. Finish with a clear top coat to protect your design and keep your nails glossy. For maintaining healthy nails during this process, refer to Tips for Healthy and Beautiful Nails.
Materials for Making Christmas Glitter Nails:
- Base coat
- Red or green nail polish
- Glitter polish (red, green, silver)
- Sponge for the gradient effect
- Clear top coat
These materials ensure that your Christmas Glitter Nails will shine brightly throughout the holiday season, adding an extra touch of joy and sparkle to your look.

Christmas Joy Nails
Christmas Joy Nails are the perfect way to bring festive cheer to your fingertips this holiday season. These delightful nails showcase the essence of the holidays with beautiful combinations of red, green, and white, often accentuated with charming designs such as snowflakes, holly, or even little Christmas trees. For anyone new to nail art, The Ultimate Beginner’s Guide to Nail Art: Tools, Tips, and Techniques offers an excellent starting point, and for those keeping up with the latest fashion, don’t miss Stay Stylish: Trending Nail Art Designs for [Current Year/Season]. If you’re inspired by nature, check out Bringing the Outdoors to Your Fingertips for creative ideas.
Making Christmas Joy Nails
Begin with a protective base coat to ensure the longevity of your manicure. Apply a festive base color, like vibrant red or a soft, wintry green. Use a thin nail art brush to create intricate designs such as snowflakes, holly leaves, or festive ornaments with white and gold polish. Add a touch of glitter for that extra holiday sparkle. Once the designs are complete, seal them with a clear top coat to protect your artwork and give it a glossy finish. To maintain healthy nails through the holiday season, consider the advice offered in Tips for Healthy and Beautiful Nails.
Materials for Making Christmas Joy Nails:
- Base coat
- Red or green nail polish
- White nail polish
- Gold nail polish
- Thin nail art brush
- Glitter polish
- Clear top coat
These materials will help create stunning Christmas Joy Nails, capturing the festive spirit beautifully at your fingertips.

Christmas Nail Inspiration
Christmas Nail Inspiration offers a delightful way to embrace the festive spirit through beautiful and intricate nail designs. Incorporating colors such as classic red, deep green, and snowy white, these nails are often adorned with twinkling stars, candy canes, and snowflake patterns. To achieve these lovely holiday looks, explore The Ultimate Beginner’s Guide to Nail Art: Tools, Tips, and Techniques, which provides valuable advice on achieving the perfect design. For those who love to stay on trend, Stay Stylish: Trending Nail Art Designs for [Current Year/Season] is a must-read, offering the latest tips and styles for the season.
Making Christmas Nail Inspiration
To create stunning Christmas nails, start with a protective base coat to ensure the longevity of your manicure. Choose a festive base color like red or green, and let it dry thoroughly. Next, use a thin nail art brush to paint intricate designs such as stars, candy canes, or snowflakes using white and gold polish for contrast. Emphasize the holiday spirit by adding some glitter polish to your designs. Finish with a clear top coat for a glossy shine and to seal your beautiful artwork. Remember to keep your nails healthy throughout the season with helpful suggestions from Tips for Healthy and Beautiful Nails.
Materials for Making Christmas Nail Inspiration:
- Base coat
- Red or green nail polish
- White nail polish
- Gold nail polish
- Thin nail art brush
- Glitter polish
- Clear top coat
These materials will help you bring the holiday cheer to your fingertips, capturing the festive spirit with Christmas Nail Inspiration designs.

Christmas Sparkle Nails
Christmas Sparkle Nails bring an extra touch of glamour to the festive season, making your nails the perfect accessory for holiday gatherings. Incorporating rich colors like ruby red, emerald green, and shimmering gold, these nails often feature glitter accents and sparkling designs that capture the festive spirit. For anyone looking to achieve these stunning looks, The Ultimate Beginner’s Guide to Nail Art: Tools, Tips, and Techniques provides essential advice on nail art techniques. Additionally, staying on top of trends is easy with Stay Stylish: Trending Nail Art Designs for [Current Year/Season], which offers the latest in holiday nail fashion.
Creating Sparkling Christmas Nails
Creating sparkling Christmas nails starts with a protective base coat to ensure that the polish adheres well and lasts longer. Choose a festive and sparkly base color such as red or green, allowing it to dry completely. Using fine glitter polish and a thin brush, add glittery accents or intricate designs like snowflakes and stars. Layering different shades of glitter can create a more dynamic look. Seal your design with a clear top coat for a glossy shine and to protect your artwork. Nail health is also crucial, so refer to Tips for Healthy and Beautiful Nails to keep your nails strong and vibrant.
Materials for Sparkling Christmas Nails:
- Base coat
- Festive color (red or green) nail polish
- Fine glitter polish
- Thin nail art brush
- Clear top coat
These materials will help you achieve captivating Christmas Sparkle Nails that enhance the festive spirit.

Festive Glitter Manicure
The Festive Glitter Manicure is an elegant and merry way to embrace the holiday season, bringing a touch of sparkle to your fingertips. Combining classic holiday colors such as red, green, and gold with shimmering glitter, this manicure stands out at any festive gathering.
Creating the Festive Glitter Manicure
To achieve a lovely festive glitter manicure, start with a layer of protective base coat to shield your nails from staining and ensure a long-lasting effect. Apply a rich red or green base color and allow it to dry completely. Use fine glitter polish or glitter dust to add sparkle accents over the colored base, focusing on the tips or creating gradient effects. A thin nail art brush can be used to create intricate designs like stars or holly leaves. Finish with a glossy clear top coat to seal the glitter and add shine. Maintain healthy nails during the festive season with essential tips from Tips for Healthy and Beautiful Nails.
Materials for Festive Glitter Manicure:
- Base coat
- Red or green nail polish
- Fine glitter polish or glitter dust
- Thin nail art brush
- Clear top coat
These materials will help you achieve a stunning Festive Glitter Manicure, spreading holiday cheer wherever you go.

Glittery Holiday Nails
Glittery Holiday Nails add a touch of magic to the festive season, capturing the joy and warmth of the holidays. Often incorporating a mix of bold colors like deep red, green, and gold with sparkling glitter, these nails are both eye-catching and elegant. For those new to nail art, The Ultimate Beginner’s Guide to Nail Art: Tools, Tips, and Techniques provides a comprehensive start.
Creating Glittery Holiday Nails
Creating glittery holiday nails begins with a base coat to protect and smooth the nail surface. Once the base coat is dry, choose a festive color such as deep red or emerald green, and apply it evenly. For a touch of sparkle, add a layer of fine glitter polish or sprinkle glitter dust on wet polish. Using a thin nail art brush, intricate designs like snowflakes or stars can be added for a detailed look. Finish with a clear top coat to seal in the design and add a glossy finish. Ensure nail health with tips from Tips for Healthy and Beautiful Nails to keep your nails both strong and stunning.
Materials for Glittery Holiday Nails:
- Base coat
- Deep red or emerald green nail polish
- Fine glitter polish or glitter dust
- Thin nail art brush
- Clear top coat
These steps and materials will guide you to achieve breathtaking Glittery Holiday Nails fit for any festive occasion.

Jolly Holiday Nails
Embrace the festive spirit with Jolly Holiday Nails, where creativity meets celebration in vibrant hues and playful designs. This style brings together the warmth of the holiday season with charming motifs like snowflakes, candy canes, and glittery accents. For beginners looking to dive into holiday nail art, The Ultimate Beginner’s Guide to Nail Art: Tools, Tips, and Techniques provides all the essentials. As trends evolve, Stay Stylish: Trending Nail Art Designs for [Current Year/Season] ensures your nails remain at the forefront of fashion, capturing the magic of the season.
Creating Jolly Holiday Nails
Achieving jolly holiday nails starts with a nourishing base coat to prep and protect the nails. Once the base is ready, apply a cheerful red or frosty white polish as the groundwork. Sprinkle with glitter or use nail stickers to add delightful patterns that embody the holiday spirit. A fine-tipped brush can be employed for delicate designs such as snowflakes or holly leaves. Seal everything with a high-shine top coat to enhance durability and sparkle. For maintaining nail health amid the festivities, consult Tips for Healthy and Beautiful Nails.
Materials for Jolly Holiday Nails:
- Base coat
- Cheerful red or frosty white nail polish
- Glitter or holiday-themed nail stickers
- Fine-tipped nail art brush
- Clear top coat
These elements will help you create delightful Jolly Holiday Nails that reflect the joy and cheer of the festive season.

Joyful Christmas Manicure
Embrace the festive spirit with a Joyful Christmas Manicure, a perfect way to get into the holiday mood. This cheerful and whimsical nail art adds a touch of festive flair to any holiday outfit, making it ideal for Christmas parties, family gatherings, or simply adding some seasonal joy to your daily routine. The Christmas-inspired designs, featuring classic holiday symbols such as snowflakes, Santa hats, and Christmas trees, offer a delightful way to express your holiday cheer. This manicure style can complement various holiday looks and inject a sense of joy and celebration into the season.
Making Joyful Christmas Manicure
Bulleted Materials List:
- Red, green, and white nail polishes
- Fine nail art brushes
- Glitter polish or nail art glitter
- Nail decals or stickers
- Top coat for a shiny finish
Step-by-Step Process
For added sparkle, incorporate glitter polish to accentuate the holiday theme. You can also use nail decals to simplify the process and achieve a polished look. Once your design is complete, apply a top coat to seal and protect the festive art. For more ideas and in-depth techniques, explore this Instagram link.
For further inspiration and techniques, readers may refer to The Ultimate Beginner’s Guide to Nail Art: Tools, Tips, and Techniques and stay updated with Trending Nail Art Designs for [Current Year/Season], ensuring their nails remain both stylish and seasonal while maintaining Tips for Healthy and Beautiful Nails.

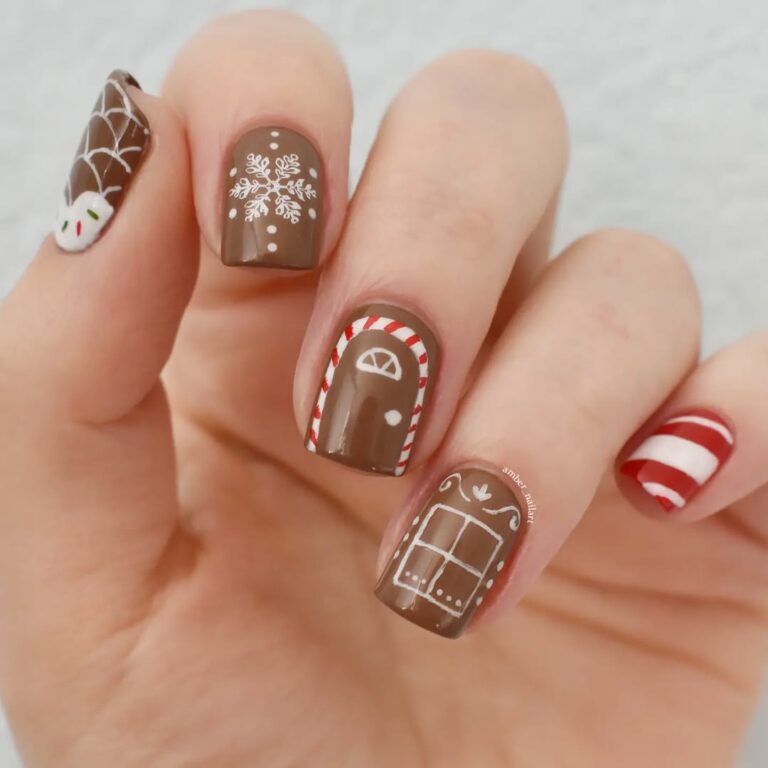
Merry Christmas Art
Create a festive atmosphere with a Merry Christmas Art manicure that brings holiday cheer to your fingertips. This playful and vibrant nail art is ideal for holiday parties, cozy winter gatherings, or as a joyful addition to your everyday style during the Christmas season. Featuring classic Christmas symbols and colors, this nail design adds a touch of holiday magic to any look, spreading cheer and warmth wherever you go. It’s a delightful way to express your excitement for the holidays and to showcase your festive spirit through creative and eye-catching nails.
Bulleted Materials List:
- Red, green, white nail polishes
- Fine nail art brushes
- Nail art stamps or decals
- Rhinestones or glitter
- Top coat for protection and shine

Seasonal Nail Art
Seasonal Nail Art is a wonderful way to reflect the beauty of each season at your fingertips, enhancing your style with vibrant and trendy designs. Whether it’s the fresh flowers of spring, the sunny hues of summer, the warm shades of autumn, or the glittering frosts of winter, Seasonal Nail Art adds a touch of elegance and excitement to every outfit. Perfect for expressing personal style and celebrating the changing seasons, this art allows for endless creativity and personalization. By showcasing seasonal details on nails, one can bring the outdoors to their fingertips, enhancing every moment with a subtle charm.
Bulleted Materials List:
- A variety of nail polish colors, including seasonal shades
- Fine nail art brushes
- Nail décor such as stickers or decals
- Top coat for finishing

Winter Nail Trends
Winter Nail Trends embrace the icy elegance and festive spirit of the colder months, adding a sophisticated touch to any look. From shimmering snowflakes to deep, rich hues, these designs allow for the celebration of winter’s beauty right at your fingertips. They are perfect for holiday parties, cozy gatherings, or simply for adding a bit of sparkle to everyday life. Exploring Winter Nail Trends can provide inspiration and new ideas to stay stylish with trending nail art designs for the current season. By reflecting the beauty of winter landscapes, these designs truly bring the outdoors to your fingertips.
Bulleted Materials List:
- Deep and glittery nail polish colors
- Fine nail art brushes
- Nail adhesive gems or decals
- Clear top coat
Step-by-Step Process
To create Winter Nail Art, begin by applying a base coat in a deep, winter-inspired color such as navy blue or burgundy. Using fine nail art brushes, paint delicate designs like snowflakes or glittering stars to capture the essence of the season. Adorn your nails with adhesive gems or decals for a more festive look. Finally, seal the design with a clear top coat to ensure longevity and a polished finish.

Winter Wonderland Nails
Winter Wonderland Nails are perfect for embracing the magic of the winter season. Whether attending holiday parties or cozying up by the fireplace, these nails add a touch of elegance and festivity to any outfit. Nail art enthusiasts can explore various designs and techniques to make their nails stand out, giving them a unique winter-themed look. For more on this, check out “The Ultimate Beginner’s Guide to Nail Art: Tools, Tips, and Techniques.”
Making:
Creating Winter Wonderland Nails requires a few essential materials and some creativity. Start by preparing the nails with a base coat to protect them. Next, apply a shimmery or glittery polish to resemble snow. Use fine brush or nail art tools to add intricate designs such as snowflakes, icicles, or winter landscapes. For added detail, consider using small gems or metallic accents to make the designs pop. Check out more ideas on trendy designs in “Stay Stylish: Trending Nail Art Designs for [Current Year/Season].”
Materials:
- Base coat
- Shimmery/glittery polish
- Fine brush/nail art tools
- Small gems or metallic accents
- Top coat

Bright Christmas Nails
Bright Christmas Nails bring a festive dazzle that captures the spirit of the holiday season. Perfect for celebrations, they shine amidst holiday gatherings, making hands look both elegant and playful. These vibrant designs are also perfect for enhancing the joy of gift-giving and sharing special moments with loved ones. Nail art enthusiasts can find inspiration by exploring “The Ultimate Beginner’s Guide to Nail Art: Tools, Tips, and Techniques,” which offers a concise, super-simple-to-read SEO-optimised paragraph description of creating beautiful nail art.
Making:
To create Bright Christmas Nails, one starts by choosing bold, festive colors like red, green, and gold. A steady hand is needed to apply these colors as a base. Nail art tools come in handy for adding fine details like holly leaves, stars, or ornaments. Finishing with a shiny top coat seals the art and enhances its brightness. For the latest trends, “Stay Stylish: Trending Nail Art Designs for [Current Year/Season]” provides useful insights. Don’t forget to ensure nail health with advice from “Tips for Healthy and Beautiful Nails.”
Materials:
- Bold red, green, and gold polish
- Fine brush/nail art tools
- Shiny top coat